Showing posts with label pots. Show all posts

Monday, October 9, 2017

The trouble with pots


The trouble I have with pots is that I wax and wane in my use of them. My garden seems to go through cycles ranging from "sorry, we need minimal pots" to "more pots please" ... and right now, I'm swinging back to using more pots.

I have only made this situation worse because last weekend I tidied up my spare pots area, for the simple reason that this unsightly spot used to be hidden from view. Alas, recent garden renovations have removed the dense screen of ginger plants that concealed the pots, and so now my pots area is neatly sorted into sizes and types. 


That's where the troubled brewed up. For example, as I stacked the wide, shallow dish-shaped pots, I thought to myself that they really could contain all the mixed leafy salad greens that two little people could need. Removing the greens from the vegie beds into the pots would then provide more space for my preference — other vegies — or Pammy's preference — more flowers.

The trouble with that idea is that I bought that same wide, shallow pot several years ago precisely to grow more salad greens. I did it successfully for a few years, but it was a lot more work than simply plonking the salad green seedlings or seeds into a garden bed.

And that's the trouble with pots. They seem like a gardener's best friend, a real problem-solver ... but then a few months later you realise that they are more work. They need more watering, more feeding and every second year or so, complete repotting.

Has this deterred me from entering a new cycle of "more pots please"? No, afraid not. 

And no, it's not a tragic cycle. You see, I have more time on my hands now that I am winding down into a semi-retired pattern of work. Several years ago I was much busier, and staying on top of the workload of keeping potted plants happy was more of a chore.

Despite the fact that I seem to be a remarkably slow learner at times, as I am now entering a positive "you can do it" phase with pots, here are several perfectly good reasons to grow plants in pots.


Limit the size of spreading plants. In this case, it's a pot containing all the oregano we will ever need. In a garden bed, oregano can spread a metre or more if it's happy. Here in the pot it has to be content with 30cm. All I need to do is cut it back every three months. Another truly rotten spreader is mint, which you should never grow in the ground if you have limited space. 


Keep fruit trees down to a manageable size. Our potted Turkish Brown fig tree is content in its pot, and so is its close neighbour, a potted Thai lime tree. In the ground, both would grow much bigger, and our garden already has an olive, a Tahitian lime and a Eureka lemon in the ground, so there is no more room.


Put kitchen garden herbs within easy reach. You can almost smell this fragrant forest of young basil, and as well as using leaves for staples such as tomato sauces or pesto, just a few torn leaves tossed into a garden salad works wonders. Other nearby pots contain mint, tarragon, chives, thyme, rosemary and sage.


Grow specialised plants in potting mixes designed for them. Our garden has all sorts of interesting plants, such as this colourful succulent, Crassula 'Campfire', planted into pots containing potting mixes designed to suit them. As well as succulents, there are bromeliads, orchids and water-loving Louisiana iris. Each requires its own special mix, but if you give plants the exact conditions they love to grow in, they tend to be much happier and easier to look after.  

And so all I really have to offer with this posting is that pots are an essential part of any garden. Their downside is that they are more work, but their upside is that they can solve all sorts of problems, and even allow you to grow a much wider variety of plants than if you just tried to grow everything in the ground. And for a plant-lover like me, that final point seals the deal.

I'll be growing plants in pots for all my days here. It's just that every now and then I'll scale back on them for a while, then I'll bounce back a year or two later filled with fresh enthusiasm for them. 

This waxing and waning, of de-potting then re-potting, is just another of life's and gardening's steady little cycles.


Sunday, October 8, 2017

Old-fashioned hydrangeas


I'm a bit of a sucker for anything that's out of fashion. Whether it's collecting garden gnomes, listening to bands with accordion players, or cooking time-consuming recipes, I'm your boy. 

Out in the garden, I'm often growing something that's supposedly out of fashion, and happily so. In a few weeks from now my cottagey old Nigella 'Love in a Mist' blooms will be out again, and today I've planted hydrangeas, to replace our unruly thicket of ornamental ginger which I reported on in my previous posting.

I like blue hydrangeas, and Pammy asked for a white one, so I bought both. This is the label for the blue ones (I bought three small pots at Bunnings for $13.95 each). 

And this is the far more traditional label for the larger and more expensive ($25) white hydrangea that Pammy wanted, which I found at a local garden centre.

Prior to planting I used the good old "put and look" method of figuring out where to plant each of the new people. The three small blue ones will grow together against the fence (and hopefully block our view of it) while the larger white one's job, apart from looking pretty, is to grow to its full 120cm high and wide and block any views of my less than gorgeous compost tumbler bin and various spare pots. 

Fortunately the blue hydrangeas' labels provided very good information on the plant size and spacing, but I have planted mine a bit closer together than recommended, as I want a dense effect from the hydrangeas to cover up the fence entirely.

After planting them, then watering in with seaweed solution, I spread out a good layer of sugar cane mulch to reduce the rampant weeds and retain some semblance of soil moisture. Besides, I just love the way mulched gardens look.

Once you start renovating, there's a "knock-on" phenomenon that applies to renovations both inside the house and outside in the garden. Fix or change anything, and it immediately makes the bit next to it, or behind it, look bad or weird or at least in need of renovation. The "knock-on" effect is that you are then obliged to do something about the next-door section to your renovation. It's a slippery slope of endless renovations ...

Now, in the case of renovating the ginger patch and turning it into hydrangea land, my previously hidden, messy disgrace of a composting area/pot storage zone is now there for all to see. The shame!

And so yesterday morning I spent a few hours pulling out every pot and sorting them out into this much better, much tidier area. I'm so proud of it that here I am including it in my hydrangea blog posting! 

The trouble is, now I've renovated my ginger patch, and then renovated my pot storage area, it has made me rethink how I am using pots in the garden, and that's what I plan to do a posting on next. 

It never ends!


Saturday, December 6, 2014

Pots & rain, a handy tip


All Sydney gardeners don't need to be told about the weather right now, but for those of you elsewhere on the planet, we are living through a stormy, tropical style summer this year. Hot, humid days, with violent thunderstorms every afternoon and evening. 

And that's the kind of weather which can kill a lot of potted plants, for the simple reason that gardeners think there's no need to water their potted plants, as Huey the weather god has that job covered. And that's my handy tip: go check your potted plants. There's a good chance the soil could be dry (amazingly enough), and so you should still think about watering your potted plants, crazy as it sounds. I checked my potted plants this morning, and they all needed watering. Here's why...

This potted cherry tomato's leaves form a virtual
umbrella over the top of the pot, and the "catchment
area" of potted soil for water from that violent
10-minute downpour of rain is no bigger than
a handkerchief. When I checked this morning, the
intense heat of yesterday had dried out the pot,
and the downpour of rain hadn't made up the
shortfall of moisture. So I watered it.
It was the same story with my potted fig tree, and
right now, as those delicious fruits are forming, this
little Turkish Brown fig tree loves water.
The Thai Lime is also forming fruits galore, and
even though it is in a big pot (as is the fig), it
still needed watering this morning.
So this is an old gardener's tip that is well worth repeating. Never take it for granted that last night's shower of rain has properly watered your pots. Check them the next morning, and you could save a life — a precious, delicious, fruit-bearing life!


Saturday, January 11, 2014

Salads in pots


Everyone I greeted on my usual Saturday morning walk up to Marrickville Road and back seemed to be of the opinion that today's weather is just about perfect. A beautiful day, a Goldilocks summer's day. Just right. Not too hot, such a gentle breeze you hardly notice it, and the shade of buildings and trees feels as cool and refreshing as a drink of lemonade. Shame it isn't like this every day of summer, so all you can do on a day like this is enjoy it while you can.

The problem with summer here in Sydney is that these lovely days are outnumbered by the hotter days, the searing days when the moment you step outside you can feel your bare skin slowly burning. 

Sadly, this hot season isn't a great time to grow salad greens. That's ironic, as it's the ideal time to enjoy light meals of a grill with a salad on the side. My usual sunny vegie beds are just too hot for salad greens to last long in summer. Forget to water them just one day, or believe the morning weather forecasts of 'showers' and not bother to water the garden on a day that turned out to be dry and sunny yet again, and salad greens soon wilt and die. If they survive, they get through their life-cycle in what seems like a fortnight, shooting to seed in no time.

And so, the solution I use is to grow small crops of salad greens in pots, and put the pots in spots which get nice morning sun, then little or no sizzling afternoon sun. It works, but the trick with salads in pots is to water them every day, and don't trust the weather people. 

This is the basic set-up for two, a pot of rocket in
front, and some mixed greens at the back.
Apart from watering daily, the other trick is light
liquid feeds, especially after you've harvested
a big swathe of leaves.
This is a pot of radish seedlings, a new addition to the mix.
I love the way radish seed sprout in 4 or 5 days.
These are red and brown mignonette lettuce seedlings, which
also came up from seed in just four days. They need mollycoddling
in this heat, so I'm keeping them in a cooler spot to let them
grow up to about 7-10cm tall, then I'll cram the healthiest
healthiest half-dozen seedlings into a wide, shallow pot,
mixing up the two leaf colours for a nice looking effect.

Finally, a little experiment. Hopefully you can see the little
ruby coloured seedlings in the photo. These are a new idea
from Yates seeds, sent to us by the lovely Judy Horton of
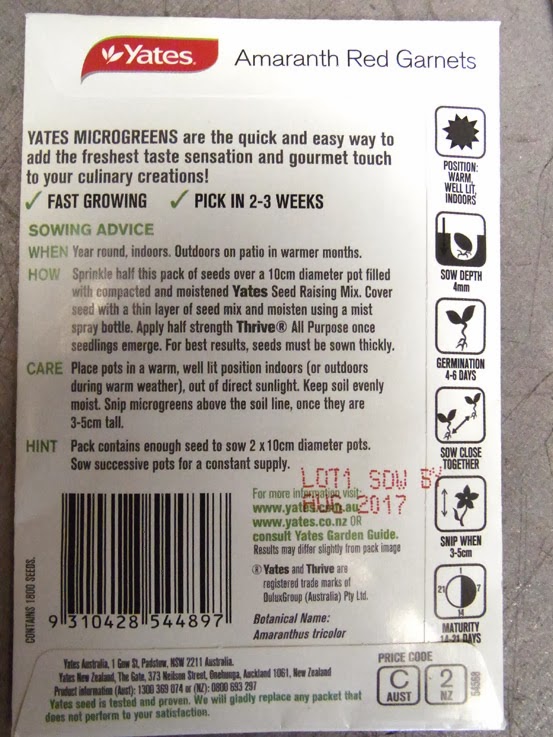
Yates to try out. It's a new range called Microgreens, quick-
growing salad greens which you harvest when they're baby sized.
So far so good, they've come up quickly, in five days.
Judy sent us four packets to try. Our little red
babies are the 'Cabbage Rubies'. The idea is
that you sow about half a whole packet of the
seeds in a small (10cm) pot. You can grow
them indoors, on a windowsill, but I'm
growing ours outside. As the seed packet
says "pick in 2-3 weeks". That's what we'll do.
Some seed packets give you too little growing
info, but Yates can't be accused of that. There
are enough instructions here to give even the
most basic beginner some confidence.
 So, if your salad greens in the garden bed are having a tough time of it here in Australia right now, you're not alone with that problem. My tip is to go potty until autumn. I prefer a mixture of leaves, so those 'mesclun' mixes are perfect for pots. The one great thing about pots is that you can move them to the 'perfect' spot that gets the right mix of sun and shade in summer. The problem with pots is that they're a bit more work, but all that really means is daily watering, before you head off for work.


Thursday, October 3, 2013

Gone potty over herbs


After my previous blog posting on the new 'Herbs & Spices' book by Don Burke, as well as my own potted herb garden, one of my regular and most thoughtful commenters, Shivangni Sharma, got in touch with me via email (as she usually does) to ask: "Why did you pot up the herbs? I keep lamenting that I don't have ground to plant them! Is it a blessing to be forced to grow in pots?"

It was perfect timing by Shivangni, as that topic was something I was thinking of discussing in my last posting, but as that post was becoming over-long (as usual) I decided to write something next time.

No, it's not a blessing to be forced to grow herbs in pots, Shivangni. The simple reason I have moved my herbs from being planted in the ground, to pots, is lack of space. My in-ground herb plants were so big and vigorous that they were taking up too much space. I wanted to grow more different plants, especially succulents – and Pammy wanted more flowers – and so with our little garden just 9 metres long and 7 metres wide, the beautiful, fragrant herbs were taking up just a bit too much space. Grown in pots, they still provide more than enough flavour in the kitchen, but they let me grow more succulents, and Pam can have more lavenders, tibouchinas, gardenias and other flowers.

The in-ground herbs are beautiful plants, and if I had a bigger garden that's where I'd always grow every one of them - in the ground. But before I say goodbye to my in-ground herbs for a while at least, just one last look back over the shoulder at them...


Here's a perfectly good reason to grow herbs in the ground.
This photo of my former sage plant (now in a pot) is still one
of my favourites. But herein lies the problem. This is enough
sage for a hundred cooks' needs. It's over one metre wide.
I went mad over curly parsley borders. I filled up the blank
space in the middle with lettuce, silver beet and marigolds,
but my real mission here was a curly parsley border.
The thyme became a marvellous monster.
Only the left third of this plant is growing
in soil; the right-side two-thirds of it is
loving the hot life on the pavers. It thinks
it's in the Mediterranean, with its roots in
a patch of dry, crumbly hillside and the
rest of the plant behaving like a sunbathing
tourist, stretching out and sunning itself
on the rocks. Happy days.
Summer's a lovely time for herbs here, such as this combo
of basil behind a curly parsley border, shallots to the left and
a wall of blue-flowering sage in the background.

So, Shivangni, I have made life a bit harder for myself by growing herbs in pots. They are a lot more work in pots, so much easier in the ground. But my garden is small and so the workload is only relatively greater. The space created by removing the sage and the thyme has made my new succulent garden possible, and Pam has more lavender and tibouchina to enjoy. And we still have enough herbs to cook with.

There's only a few tricks to growing herbs in pots. The main one is the same one for growing herbs in the ground. Constant trimming to keep them bushy is the main game. Don't think of yourself as your herbs' gardener. Think of yourself as their barber. Trim herbs whether you need them for cooking or not. All herbs benefit from regular trims.

The second trick is pot feet under pots. Good soil drainage is vital to keep most herbs happy (with the exception of that cunning swamp fox, mint).

I was almost going to write that the third trick is sunshine, but there's enough exceptions to repeal it as a rule. For example, mint likes semi shade, chervil is the same. While parsley loves sunshine it copes remarkably well with only partial sunshine, so too oregano, and tarragon is a bit of a wilter in the hot afternoon sunshine, so giving it some respite from the strongest Aussie sunbeams is a good thing for it. 

Most of the other popular herbs can be called sun-lovers, and if yours are not getting enough sunshine and they're not doing well in your garden, that's the problem!

Finally, if you missed my previous posting on my current gaggle of potted herbs, which prompted Shivangni's question, it's here. That posting was also a thinly disguised plug for this book, pictured below, which I helped to produce, and which is on sale now. It has so much info about herbs and spices, I'll understand if you'll never have to read my blog postings on herbs again! Actually, I won't understand! It's just the kind of nonsense that salespeople say that they don't really mean. But they say it anyway.


Wednesday, April 24, 2013

Seedy pots


When we did the makeover of our garden in early spring last year, one of the things I wanted to do was reduce the number of things growing in pots here. I had dozens of them, a lot of them succulents. And so I guess, with my succulent garden now planted in the ground, I have reduced pot numbers markedly. But they're making a comeback! I seem to be growing more things in pots again. Right now it's herbs and salad greens which  are coming up from seed, in a gaggle of pots parked here and there.

I guess this is because pots have so many attractions. For one thing they contain the size of your 'patch' of whatever you are growing. And secondly, the soil is nice, really nice (well, for a while at least). Thirdly, you can move pots around, first to the gentle, dappled sun/shade when they are baby seedlings making a start in life, then out into the open sunshine to catch the autumn warmth once they're growing well. So far, almost everything has gone to plan, except for one hitch which was all my fault. Here's the story so far...


So-called 'micro-green salad mix' which is actually normal
salad mix. The 'micro-green' bit is where you harvest these things
young, nothing else. For lunch today I'll be getting out the
scissors and snipping off enough to go in a sandwich.

This is the exciting action shot of how it all looked once I had
sowed the seeds, back on March 18 this year.
And this is what I sowed: coriander, chervil, flat-leaf parsley
and those 'micro-greens', a freebie from BBY magazine.

Five weeks later and the parsley is doing really well. The first
trick with the slow-to-germinate parsley seed is to soak them
in boiling water first (just put the seed in a bowl, pour over
the boiling water, and leave them there until the water is cool.)
Instead of taking the usual three or four weeks to sprout, they
were up in two weeks, and they've been growing eagerly ever
since. The other trick with parsley is to grow them from seed,
not seedlings. Parsley belongs to the Apiaceae family of plants,
which also includes carrots, chervil and parsnips. All of them like
to send down long taproots and they hate to be interrupted! They
resent 
being transplanted as seedlings. When you grow parsley
from transplanted seedlings they might survive OK (but they
can have a higher failure rate, especially in warm weather) and they
also tend to go to seed more rapidly than plants raised from seed. 

Coriander is another one that belongs to the parsley family,
and it does better from seed, too. It also does better in gardens
here in Sydney in winter. The slower growth rate now suits
coriander fine, and this pot will last for months. If you grow
coriander in a hotter climate you need to do it like a farmer,
sowing then harvesting the whole plant six weeks later, then
replanting and harvesting six weeks later, and so on. In hot
weather, if you let the plants grow on, the leaves change from
broad and flat to spindly, then they flower (very prettily) then
they set seed, all in very rapid succession. So the trick to being
a lazy backyard coriander grower, who just wants some leaves
on hand most of the time, is to grow it from seed in autumn.

The chervil is coming up but lagging behind, and that's entirely
my fault. Why? Well, if I had bothered to look at the seed
packet I might have noticed that my seeds were well past their
'use-by' date, and none of the original batch came up. So I
re-ordered another packet of seeds from The Italian Gardener,
they arrived in the mail a few days later, and about 10 days
later the seeds came up and they've been doing fine ever since.
Apart from its delicate, mildly aniseedy flavour, the great thing
about chervil is that is isn't a 'sun-hog'. If your garden isn't
as ideally sunny as you'd like it to be, chervil does well on
half-day sun rations. More people should grow it. We love it
with steamed vegetables, finely chopped and added just
before serving. It transforms steamed zucchini.


Monday, May 16, 2011

Wall flowers


I think I've found the plant to happily occupy my trio of wall pots. If happiness is a flower, then my Vriesia bromeliads are happy here, as two of the three potted bromeliads, which I only planted here a few months ago as little baby 'pups', are already in flower.

This very handy bromeliad website tells me that my bromeliad is Vriesia 'Isabel', no doubt one of the hardiest and easiest broms to grow, because as a brom beginner it would have to be a tough and easy one for me to grow, as I don't really know all that much about them.

Before I move on to my inevitable blathering on about what precious little I know about broms, let's just give my snazzy new pocket digital camera a spin in macro mode and have a look at this brom bloom, close-up. Does that scream 'tropical' at you, or what?

Now, here's a far less pretty shot of two of the three pots in situ. Terracotta wall pots, bolted to the wall, doing their usual business of leaching salts out of the pores and leaving a white crust, like kids' mouths after eating ice-creams.

This area gets zero direct sunshine, but stacks of filtered sun via the polycarbonate roofing of the pergola overhead, and the shadecloth on the western side. In summer it can get very hot and humid here, but it's sheltered from all cool southerly and westerly winds. It's a spot that suits the tropical/subtropical broms to a tee. Never sunny, never cold, occasionally stinking hot and humid – just like its South American home!

I had tried New Guinea impatiens in these pots, but they were so thirsty that the slightest inattention to watering led to instant wilting, and a wilting plant is just such a pathetic, sad thing to come across regularly that I pulled them out in disgust. Then the pots lay empty for part of the summer, as I pondered what to plant there. It was only when I decided to repot my bromeliads, and had too many 'pups' (baby broms) and not enough pots on hand to put them in, that I (thick as a brick) finally thought of the wall pots.

It turns out that I should have had them in wall pots all along. In the wild broms don't grow in soil. They mostly cling onto tree branches or, sometimes, rocks. And so the small amount of soil in a narrow wall pot isn't a problem for them at all. The potting mix I use is the one our magazine suggests: 50:50 orchid bark and ordinary potting mix. Seems to work OK!

As for care, they're dead easy. They do like to have some water in their little central 'cup', but it doesn't have to be constantly full or topped up. During our cooler temperate winters they like to be kept on the dry side, and during summer they like things on the moist and humid side. I sprinkle some slow-release fertiliser around them, and that's it. I guess I'm watering them about twice a week now, in autumn, and it'll be down to once a week in winter. Overwatering in winter is a really good way to kill them (a bit like indoor tropical plants, come to think of it.)

As I mentioned earlier, these wall-potted plants were planted as 'pups', new plants which spring up from the sides of the parent, from the base of the plant. I waited until the pups were about one-third the size of the parent plant, then cut them off with a knife, trying to take some roots with each pup.

After sending up its litter of pups the parent plant dies off (I'm not sure if that bit is true to all broms or not, but it's true for the few broms I have, Vriesias and Neoregelias.) And so an occasional routine around here is unpotting, dividing up, and repotting the pups (but if you don't get around to this, it doesn't matter, the pot will just be chockers with pups growing into adults).

Each time I do my repotting the number of plants has steadily grown. Hardly any die, so the way I keep the numbers of potted plants down is simply to give some away. So if you see a bromeliad and are tempted, or someone who already owns some offers you a freebie, take it.

Find a sheltered spot away from too much direct sun, such as a wall under a balcony or pergola, install some wall pots, and give amazing tropical bromeliads a go. There's only a zillion to choose from, so you'll probably find a couple of dozen that you'll adore.


Wednesday, April 13, 2011

Pot-bound!


Regular readers will know that I like to report both my successes and failures here in my little garden, but sensitive readers might like to look away, right now. Read no further, for I am about to record one of my disgraces. Thank goodness there aren't jail penalties for pot-bound plants, because they might well say 'lock him up and throw away the key' with the evidence I am about to present.

Here's one of those gruesome-but-hard-to-not-look-at crime scene photos of the evidence. This is the tangled mass of roots of my outrageously pot-bound bay tree. Makes a nice wallpaper, doesn't it?

It was never meant to get this bad, your honour. You see, I was going to get rid of my potted bay tree last year, and use the pot in which it grew to grow a fig tree. Somehow I never got around to ditching the bay tree (my garden is tiny and there is only so much space, so adding the fig and keeping the bay was not an option). The bay had to go and that was that, and its pot is the perfect size and shape for the fig.

I think 'vigorous' would be a good word to describe a bay tree's attitude to growth and life. Look at the roots making their way out of the drainage holes. Poor things, all they struck once they escaped the pot was hard, lifeless, nutrient-poor pergola-floor tiles.

And so last Saturday the terrible deed was done. The bay tree was mercilessly cut down in its prime and replaced with a young, optimistic fig tree who knows nothing of the former occupant of its cell. I always think of potted plants as 'prisoners in a pot'. There are no pots in nature, just soil. And so it's a hard life in those confined spaces, where their roots can't roam free. No wonder some plants go stir-crazy in their pot and give up on life.

That bay tree was never going to give up, though. I suspect that despite the appalling treatment I dished out to it in its last years, that hardened inmate would have probably outlasted me in the long run. I can only throw myself on the court's mercy and beg to be let off with a warning never to do such a dreadful thing again. Everyone makes mistakes, and every time I look at a bay leaf I will feel a little pang of guilt.


Friday, January 16, 2009

Minty trims


Mint is one of those herbs that's lovely just to be around, rather like basil and rosemary. Brush past any of these three fragrant herbs and their delicious scents fill the air with thoughts of chopping boards, bubbling pots and happy handfuls of flavour. However, mint is a special case – it's a potential garden monster, a takeover merchant to rival the most rampant weeds. And so, like a wild beast, it's kept as a prisoner in a pot to tame its wandering urges and uncivilised bullying. Inevitably, being pot-bound, it becomes unkempt and needs an occasional haircut and a shave, a change of clothes and a scrub down. I do this to my pots of mint about three or four times a year. Here's how the most recent makeover turned out...


Here's the pot this morning, January 16, green and lovely and lush after its recent renovation, which started on December 21. This is common mint, my favourite, although with so many mint flavours to choose from I sometimes think I should try all the others. But those wild and crazy thoughts soon dissipate, and I mostly stick with my mate, the commoner.

Back on the morning on December 21, the pot of common mint was rapidly becoming scrappy. Leaves were tatty, probably munched by a fellow mint-loving creature. Grown in a semi-shaded spot, it always becomes a bit leggy, too. Once it starts to look like this it's all downhill, so instead of letting it get worse, it's haircut time.

I don't bother with delicate niceties such as using secateurs for the basic cutback. Hedge shears do the job swiftly, cutting all the stems back to the pot rim.

After the cutback and a final going over with my secateurs, there's nothing much left. Just a mass of bare stems an inch or so high. At this stage all it needs is a good liquid feed of something with loads of nitrogen in it. I use a popular Aussie product called Nitrosol, which is marketed as 'liquid blood & bone' and it makes anything leafy grow beautifully.

Ten days later – New Year's Day – and the first encouraging signs of new growth appear.

A second liquid feed keeps things bubbling along, too.

One week later, January 8, and we've had a green eruption. Lush growth everywhere. It always happens in a rush like this, and after all these years it's still exciting to see such vigour!

When a plant grows this well, it's easy to appreciate why it needs taming in a pot.

This is the pot this morning, January 16. It won't look like this in a short while, as I plan to harvest some of the mint to make a fresh mint chutney to go with some curries I plan to cook.

This regular cutting of herbs for cooking is one of the best ways to keep plants compact and lush. Sometimes I just cut back my herbs not because I plan to use them that night, but simply to keep them compact and healthy. This 'simulated harvest' is a great tip for herb gardens. Whether you plan to use herbs or not in the kitchen, treat all plants as if you use them constantly and your herb garden will be better for it.

Fresh Mint Chutney (Podina Chatni)
To finish off this posting I might as well include this recipe, which is from the wonderful 'Complete Asian Cookbook' by Charmaine Solomon.

1 cup firmly packed mint leaves
6 spring onions, cut into short lengths
2 fresh green chillies, deseeded and stalks removed
1 clove garlic, roughly chopped (optional)
1 teaspoon salt
2 teaspoons sugar
1 teaspoon garam masala
1/3 cup lemon juice
2 tablespoons water

Put everything in an electric blender and blend to a smooth paste.

If you don't have a blender, finely chop the onions, chillies, mint and garlic then pound them together in a mortar and pestle in batches, then combine the pounded ingredients with the salt, sugar, spices, juice and water.

Once made, cover and chill until serving time. Serve as a side dish with curries and rice.

Substitutes: you can substitute fresh coriander (cilantro) leaves for the mint, to make fresh coriander chutney, which is also lovely. For the coriander chutney, Charmaine Solomon suggests adding a teaspoon of chopped fresh ginger as well.