Showing posts with label growing potatoes in a bag. Show all posts

Friday, November 20, 2015

Good crops, bad crops


Of course everyone who has ever watched a detective show on TV knows about "good cop bad cop", where one detective is nasty to the suspect (ie, the bad cop) while the other one (the good cop) offers the "perp" a drink and a kind word, in the hope that the suspect spills the beans to the nice detective before the bad one gets seriously upset and starts turning off the tape recorder and throwing chairs around the interview room.

What's this got to do with growing vegetables, you ask? Well, I suspect my vegetables are trying to work me over. My potatoes are my bad cop, my spinach is the nice guy. I think they want me to grow fewer potatoes and more spinach, but my mind doesn't work that way. I like eating both of them, so I am going to continue growing both of them, despite my dud crop of spuds trying to play the bad crop.


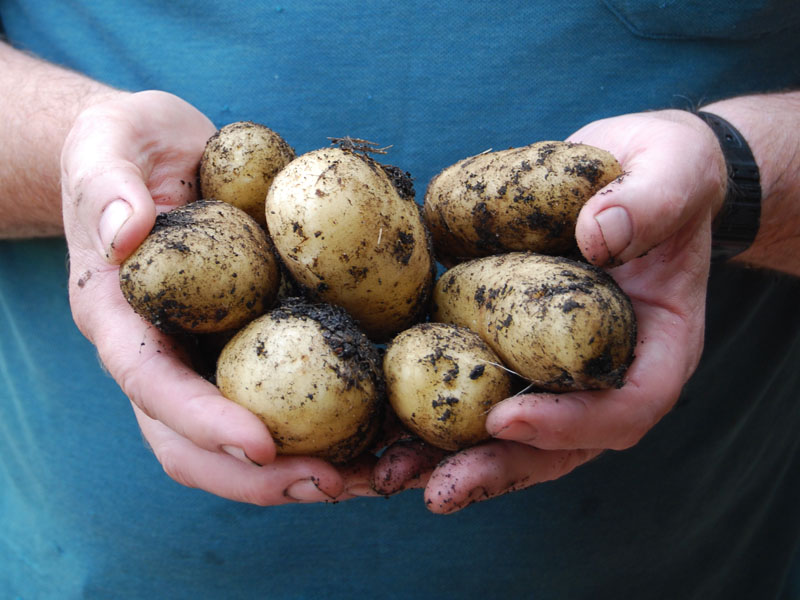
What do I mean by "dud crop of spuds?" Well, this is all of them. Not even one colander full. I was rather hoping for a few kilograms, and all I ended up with is far too many one-inch tiddler mini spuds and only a dozen or so "proper-sized" Kind Edward potatoes. Here's what happened ...


Back in mid-October, the potato plants started to do their usual thing of looking ugly. That's OK, potato crops do that. The foliage is meant to slowly die off while, underground, countless dozens of little spudettes turn into enormous great big spuds.


A month later, by mid-November, the plants looked like they'd done their dash, and so I harvested the lot ...


... and couldn't even fill one lousy colander. It's not as if this is my first go at growing spuds. I've done it a few times before, sometimes growing them in the ground and other times in bags. And I grew them this time using the same methods as before. Of course I could turn around and blame my seed potato supplier, but that would be churlish (however, I have resolved not to order from that same supplier next year, just as a precaution). Never fear though, this potato-loving boy will be back next season, hoping for a better result.


Meanwhile, in the very same patch of ground, and right next door to the dud spuds, my long-lasting crop of perpetual spinach had reached peak abundance, so I harvested the lot before our forecast scorching hot 41°C Friday hits us.


Ever the experimenter, several months ago I spotted a red-stemmed variety of perpetual spinach in amongst the more regular green types at the local nursery, so I have given that a try. Perpetual spinach isn't English spinach, and it isn't silver beet, and it isn't ruby chard. It's a close relative of all these, but it has the lovely quality of simply lasting a long time in the ground.

When the leaves are young and small we pick them as colourful little extras in a leafy green salad. Later on, once the number of leaves gets ahead of us and they mature into bigger leaves, we've been picking several at a time for cooking as a spinach side dish. (My favourite is to simply stir-fry it, along with currants (or sultanas) and pine nuts.)

The flavour is closer to English spinach than the more pungent silver beet/chard, but the main benefit of this is the way it lasts and lasts through all the winter months and spring. Once summer's heat comes along it's a goner, bolting to seed, but I've given up growing short-lived English spinach and rely instead on this. I'm not sure of its botanical name, but it's sold in nurseries around here as perpetual spinach, so give it a try once the worst of summer has passed.

And so, even if my vegie patch wants me to grow more spinach, I'm not taking the bait. Next year I will spud-up again, and there'll be trouble if there ain't a bumper crop!


Sunday, August 30, 2015

The Hills are Alive


Listening to our favourite Sunday morning music show, Chicken Hotrod on 2RRR community radio, I was struck by the idea that there's a hundred different ways to sing a song and come up with good results.

Well folks, it's the same with growing potatoes. There's a hundred different ways to do it, and all of them can come up with good results. 

I was Googling "when to hill around potatoes" and I came up with (maybe not a hundred) but lots of different ideas. Some said to start doing it when plants are 6 inches high, others said to wait until when plants are 10 inches high, when plants are 12 inches high, even one daredevil advocating waiting until her plants were 16 inches high. 

As to "what" to use when hilling around your spuds, some said "just use compost", others said "just use straw", others said "mix up straw and compost". There were votes for "potting mix" and some for good old "garden soil".

I'll bet you that all these good folk advocate their methods because they worked for them. So, I think the big message to newbie spud growers is just to relax. No matter what you do will probably work just fine. So, here's what I did this morning.


Here's my bag of spuds with the plants about 6 inches high. So you can call me an "early hiller" if you like. "Why this thing called 'hilling'?". Excellent question. That's the one thing the spud growers of the world ALL seem to agree on. If you mound up soil around your growing potato plants you will get a bigger crop of spuds, and you will also get a bigger crop of spuds that are edible. If growing spuds are exposed to sunlight they will become green, inedible potatoes, so hilling serves to cover up the crops of spuds forming.  


 I've shared my excess spuds and extra spud bag with my good friend Jolanda, and she has a bag of compost which she will be using to hill around her spuds. I'm doing it slightly differently, mostly because I like the way it looks. Yes, it's that irrational, folks! I'm mixing up my own homemade compost with handfuls of straw in a roughly 50:50 mix.


The easy way to mix it up is in a bucket or trug. Compost is an excellent choice because it's a gentle fertiliser that helps to feed the potato plants. The straw is nice and light, so the drainage of water through the bag should be nice and free. Besides, I just love the look of straw ... it's so farmyard.


It's so simple. Just pile in your compost, or your straw/compost blend, leaving the topmost leaves of the plants exposed.


I've got a couple of little "later starter" shoots poking through, so I'll give them a few more days to grow taller and catch up with the others, then I'll finish my first hilling job next weekend by hilling around them. 

About a month from now, the plants should have grown even taller. Next time I'll unroll the sides of the bag so it is at full height, and I'll complete a second and last "hilling" around the plants. After that all I have to do is water the bags if Huey hasn't been kind enough to help out with some rain every couple of days.

Saturday, August 22, 2015

Woo hoo, rain coming, action stations!


We gardeners are right up there in the top echelon of people who get a real kick out of enjoying life's simple pleasures. This morning, I'm a kid again, excited by the forecast of showers maybe coming this afternoon, then a definite promise of rain tomorrow. Woo hoo, the first rain in ages! Lots of little jobs to do ...

But wait, there's more. My bag of potatoes is sprouting up a forest of little green men. It's about time, too. It's been three weeks since I bagged them up (you can read all about that little excercise here). 


Traaa daaa, Mr Potato Head makes his debut. I've planted
four seed potatoes in the bad and there are four sets of
buds coming up, so they're all performing nicely.
Now that the potato shoots are up, the other job to do is to
gently fold down the sides of the bag, so the little shoots can
get some more sunlight. They don't need any fertiliser. They
are surrounded by it all already, courtesy of the compost. 

With this rain coming, it's the perfect time to get the job of
feeding the citrus trees done. Our lemon tree is covered in
new shoots, flowers and flower buds, so it's busting for a
decent feed. The same applies to our lime tree and our potted
Thai (kaffir) lime. 

Here in Australia it's best to feed citrus twice
a year, at the end of summer (in late February)
and now, the end of winter or start of spring
(late August). So if you have citrus trees, do
it now. Here's my posting on how I do it from
last February, 'Flingin' in the rain'. Today
I am again using my old standby, Dynamic Lifter.
This is outrageous. I only planted this strawberry seedling
on Wednesday, and it's already flowering. So, as well as
making sure it is well mulched, I have sprinkled around some
Dynamic Lifter and watered it in (but not too much, the
coming deluge will water in all my fertiliser for me).
Another big job to squeeze in before the rains
come is to yank out all the weeds. I'm down to
my last two square metres of weeding to do, so
it won't take long to pull these invaders out.
While weeding is a dull task, I find that if I
do it in small sections over a week or two, covering
the weeded ground with mulch as soon as I
finish, it's not such an onerous task.

One little trick with pulling weeds is to learn
what "wanted" self-seeding plants look like as
babies. These are two self-seeded Love-in-a-Mist
plants coming up, and there's about a dozen
of them showing up now near the lime tree.
I love the ethereal beauty of Love-in-a-Mist
(Nigella) flowers, and I am hoping that they
will become a permanent part of our garden
without me ever having to plant them again.
Finally, I'm planting out some more of my
supermarket sprouts. This time I am giving some
parsley sprouts a go as a border around a bed. 

I'm not sure how the parsley sprouts will take, but if they work out OK then most of the "micro sprouts" (eg, coriander, chervil, radish, sorrel, parsley) sold in punnets at my local Woolies supermarket can be treated as cheap seedlings to grow in the garden. You can read all about the original experiment here

Parsley has always been a plant which is very fussy about being transplanted as seedlings. The old wisdom is that it's best to grow parsley from seed, so I won't be surprised if my parsley seedlings don't survive. But if they do survive, I guess that will be because I planted clumps of several baby seedlings together, and all I really need from each clump is for one seedling to survive and grow to maturity.

Time will tell, but the first stage of caring for my parsley seedlings is to water them well, and I believe that Huey the rain god has that job covered for the next seven days. Over to you Huey!


Sunday, August 2, 2015

Bagging up some spuds


I reckon I must have some Inca blood in my family. Or maybe I just love spuds a lot, and so here I am again, growing spuds at home, this time in a proper 'tatey bag' from Diggers Seeds. 

I ordered mine a while ago, and in mild old inner-western Sydney, where there's never any danger of frosts damaging the baby plants, I figured this warm patch of early-spring weather we're enjoying now is a good time to get my seed potatoes planted in their bag.

First of all, we need some motivation, so here's some of the last crop of King Edward potatoes we grew here at Jamie and Pam's Garden Amateur-land.


Blushed pink, King Edward potatoes are fine all-rounder
spuds, great for chips, roasting or baking in their jackets, and
their fluffy texture produces a truly wonderful mash.
What follows is yet another exhaustive step-by-step of how I do it. Remember though that there are several other methods for growing spuds in a bag, so if somebody tells you that it can be done another way, they're probably right!

Some kind of straw is very handy, especially to form the
base on which your seed potatoes will sit inside the bag.
This is ordinary sugar cane mulch, which worked fine last
time, and which is plentiful and cheap here.
Use home-made compost by all means, but I am giving my
other Tatey bag and half my seed potatoes to a friend, Jolanda,
and so she is going to use this compost to grow her spuds.
Yes, you can use ordinary potting mix, too. But we didn't.
Compost itself is a fabulous gentle fertiliser,
so down the bottom of the bag, where the
roots will go searching for food, I will be adding
a handful of chicken poo. This time I am
using the "reduced odour" version of Dynamic
Lifter, which somewhat spoils the fun of the
whole exercise, but Jolanda's eight-year-old
daughter Elina thought the reduced odour chicken
poo was pretty disgusting, so it's certainly
not odour free.
This is the 'Tatey bag' Diggers provides. It measures
(roughly) 40cm tall, wide and high, and the handles are handy.
The tatey bags come with plenty of holes both in the bottom
and the sides, so water can drain away. You can of course
grow potatoes in a pot, but just make sure it has plenty of
drainage holes in the bottom (not just one, as some poorer
quality big ceramic pots sometimes have). The big plastic
pots usually have plentiful drainage holes.

OK, so they're your ingredients to form the bottom layer of the pot: straw, compost and chicken poo, plus a bag with lots of holes in the bottom.

For the bottom layers, I mix together several big handfuls
of straw with the same quantity of compost.
Then I fill the bag about 10cm deep with my straw and
compost mix. Then I sprinkle a handful of chicken poo over
the top, then cover that chicken poo with another 10cm of
straw and compost. This is an important point: don't let your
seed potatoes come into direct contact with the fertiliser,
so bury your fertiliser deeper than the seedling spuds.
The seedling spuds! Here they are, at last!
Here they are in their paper bag. They've already sprouted.
This is a good thing, not a bad thing. They'll grow quickly
now they are nestled into the rich planting soil. 
Generally, it's a good idea to let your seed potatoes sprout before planting them (this is the process of "chitting" that you might read about). It's not absolutely essential, but it is desirable. You can just plant your seed potatoes even if they haven't sprouted, but they might take a bit longer to get going if they haven't sprouted before planting.  

Place the seed potatoes with the sprouts facing upwards.
I've put four seed potatoes into the bag, and that's about the
maximum to plant in this kind of space.
Finally, I then covered the seed potatoes with more compost.
If you have mixed up too much compost and straw, it is
totally OK to cover the seed potatoes with more compost
and straw, of course. In fact, some potato growers like to
grow their spuds mostly in straw.
Water the bag well with at least half a can of water, and keep the soil in the bag lightly moist. Right now it's still late winter and the temperatures aren't too high, so watering the bag every third day will probably be enough. Later on, as the weather warms up, watering every second day might become the routine.

The best place to put your potato bag is a sunny spot, and that means one which gets at least six hours a day of sunshine, or the closest you can get to six hours.

As for when the first green shoots appear, it could take a couple of weeks or more. Just keep an eye on what happens.

I'm going to update my "spuds in a bag" blog when there is news to report, and I expect about a month from now there'll be a bit more work to do to keep things rolling along.

If you decide to have a go yourself, you can buy everything you need from Diggers Seeds (diggers.com.au) but your local garden centre or major hardware chain garden centre (eg, Bunnings, Mitre 10 etc) also stock "seed potatoes", so you could buy a pack of them and try your hand at potato growing in a large pot, or of course in the ground itself.

Whatever you decide, good luck.


Thursday, December 3, 2009

Last of the bagged spuds


Well, just like last year, I got sick of the awful look of the fading, scruffy potato plants ruining the ambience of my pretty garden, and so I harvested the last of the spuds a bit earlier than I probably should have. But the results were delicious!

The big white spuds are Spuntas, regarded as a fine chip-making potato. The little purple ones are Saphires, particularly tasty little things. Not visible in the shot but lurking there somewhere are some Kipflers, royalty of the potato salad spuds.

See what I mean about awful, scrappy plants? Yuk. I need a bigger garden, so I can grow spuds without having to actually look at them.

One big winner in all this exercise is my compost heap. This regally rich mix of home-grown compost and straw is the stuff I used to fill my spud bags. It's going back into the compost bins to raise the class of the place. A couple of months from now it will become beautiful, crumbly compost once more. Isn't recycling wonderful?

As for cooking my Spuntas, I went back to one of the first ways I ever learned to cook potatoes when I was about 10 years old. As well as learning from mum how to breadcrumb lamb cutlets and veal schnitzels in my first cooking lessons, I also learned how to mash potatoes and how to turn them into mum's version of chips. (Lessons in cooking something healthy, like green vegetables, came much later.)

To make mum's chips, first peel the spuds, cut in half then par-boil in salted water for about 10 minutes, until just barely starting to feel cooked. Drain then let them cool and dry for a few minutes, then cut into chunks a bit bigger than one inch cubes, or one-inch pyramids. Then heat a frypan to very hot, add oil (I use olive oil these days, mum probably used something a lot more deadly, but I can't remember what it was) and fry the potatoes, turning often, until they are crisp outside and golden brown. High heat is the trick here. Drain on paper towels. Salt. Eat.

Nothing remotely healthy about this at all. But as for delicious, it gets my vote.


Wednesday, November 18, 2009

Oops, a harvest!


Well, my experiment with growing spuds in a bag had an unexpected early part-harvest the other day, thanks mostly to Huey and his playful dumping of four inches of rain in one day on my garden. Most of the plants here just soaked up that heavy rain, but two of my six spud plants in bags went weak at the knees, keeled over, carked it, gave up the ghost. In a matter of days they started to look like ex-spud plants and a week later it was all over for them. No option but to dig down and count the bodies.

For an early harvest from a plant cut down in mere middle age, I can't grumble too much about this bunch of Spunta spuds.

Looking up Spuntas on the net and it seems these make very nice chips, although they also get a mention in despatches for being a good all-rounder. The more I read about how good Spuntas are, the more I lament their early demise! I want more of them (and I cooked some last night and yes indeed they are very yummy).

These are the spud bags just a day or two after all that rain - you can see the wilters wilting and yellowing already.

A week later and two plants have died back and the early harvest is completed.

The other victim, the purple 'Saphire' spuds, barely produced anything – just this little bunch of cocktail-size spuds which, when I cooked them, had a remarkably nice flavour for such small, under-developed spuds. And so I weep for missing out on more of them, too!

The one fun thing about this early harvest is, of course, the harvesting itself – a dirty business! Here in Australia we use the term 'bandicooting' to describe the way you burrow into the soil with your hand and arm to find spuds. (It's named after one of our native burrowing marsupials, the bandicoot, whose mostly nocturnal burrowing activities in search of food do not endear them to gardeners who have to share the same patch of ground with them.)

Shouldn't complain though. There are still four plants chugging along, hopefully growing bigger and more numerous tubers every day. And I can't blame Huey for the spud plants' demise, though. I did just have the bags sitting on the ground. Though they have a good number of drainage holes, if I had sat the bags up on something to let the water drain away, it might have helped a lot. I've done that now, and hopefully the remaining spud plants will go on to live out their full allotted time and leave behind some delicious crops that I just know I am going to enjoy!


Sunday, September 27, 2009

Speedy spuds


When they're young, there's nothing more cheerful than potato plants. What a picture of rude green health they are. It was only back on September 8 that I did a blog on bagging up spuds, having planted them just two weeks earlier. And now, on September 27 the spuds have roared away and the tallest plant is 35cm high already. They're all very green, thriving in their planter bags, and ready for a spot of 'hilling'.

Here's the happy crew this morning, spreading green cheer. However, they've grown so fast it's time to do a spot of 'hilling', or at least the bagged potato version.

After unrolling the sides of the bag by five or six inches I then filled the bag, and around the plants, with a mix of compost and straw. This 'hilling' is important, as it stops sunlight ever getting onto the crops of potatoes which form around the stems of the plants. Sunlight on spuds will make them green and poisonous, so hilling is an essential part of spud farming.

The mixture is actually compost and sugar cane mulch, the same stuff I use to mulch the garden. I think it's mixed up around 50:50 proportions, but it doesn't really matter. I know I probably don't have enough compost left over to fully fill both potato bags, so I'm using the mulch as an 'extender'. Reading online, I've noticed that some gardeners grow their spuds in nothing but straw and they still get good crops, but I think the richness of the compost surely helps. It certainly seemed to help with last year's potato crop.

This is how the bags look after the hilling. I guess that I'll have to do one more 'top up' of compost and straw in a few more weeks, as there's about six more inches of bag to unfurl.

So far so good with this year's little crop. In fact, this year's spud crop has grown even more vigorously than last year's, but they are different spud varieties I am growing this year, and this might explain the amazing growth. Also, it has been warmer this spring than last year, so that might also have a lot to do with it. Whatever the cause, the ugly black plastic bags full of spud plants are a cheerful, pleasing sight. I'm looking forward to seeing a good array of those pretty, simple white potato flowers next, and at the current rate of growth it might be sooner, rather than later.


Tuesday, September 8, 2009

Bagging up spuds


I cheerfully admit that I'm guilty of various forms of gluttony, and in growing potatoes I've found the perfect blend – gluttony for eating spuds and gluttony for punishment. Here I go again – spud growing time!

This year I'm taking a different tack – I'm growing potatoes in a bag. I'll explain why a bit later on, but one reason for growing spuds in a bag is the familiar one here in my small backyard – lack of space. Here's a photo taken this afternoon of Spudland. Just two bags. Not the prettiest bags either, so I set them amidst the pleasing greenery of spinach world and the cheery colour of some calendulas, violas and a dazzling potted succulent, Crassula 'Campfire'. Once the potato plants start growing you'll see less of the bags, anyway.

When I say 'not the prettiest bags' I suppose I should say 'downright ugly bags', but these are, at least, very practical bags. They're horticultural planter bags of very tough black plastic with drainage holes all over the place. Other friends are using car tyres for growing their spuds, but that would be one aesthetically dodgy garden project too far for Pammy, I suspect. She's hardly thrilled about the bags as it is. By the way, I sourced these bags by mail order from Botany Horticultural, at www.botanyplastics.com.au

So, here's the steps. The bottom layer is a 10cm thick layer of mulch or straw. I used sugar cane mulch because I already had some. I've rolled the sides of the bag down, to allow sunlight to hit the soil once I've done these basic first steps of making up various layers.

Then I scattered a good handful or two of pelletised chicken poo (ie, Dynamic Lifter) over the straw. Any balanced fertiliser will do, but the chicken poo is a good organic choice.

Then I covered that layer with a 5-10cm thick layer of home-made compost, of which I have a goodly supply on hand, being a keen composter! If you don't have compost you could use potting mix or very well crumbled soil, or even more straw if that's all you have. The idea here is that the spuds shouldn't come into direct contact with the chicken poo.

Then I added another 5cm layer of straw on top of my compost layer, and set the spuds on that.

Make sure the sprouted eyes of the spuds are facing upwards. (I was almost not going to grow spuds this year, but my good friend Fenella bought too many seed potatoes while on a garden shopping spree on holidays in the Blue Mountains west of Sydney. So faced with a lovely array of Spuntas, Pink Fir Apples, Saphire (which are purple) and Kipflers, I was spurred into action by Fen's spree, and generosity – thanks Fen!)

Cover the spuds with another 10cm deep layer of compost (or straw/soil/potting mix/a blend of these, or whatever you have). Then, water the lot fairly well, but not too much, not so it's muddy – more like thoroughly moistened. We've been having quite a dry, warm spell here in Sydney lately, so I've been watering the bag about every third day. All this was done about two weeks ago (August 25) and today (Sept 8) the first buds have appeared. I'll finish off the blog with 'what I plan to do next', but as an aside, here's why I'm growing spuds in bags, and not in the ground, this year...

This is last year's happy, healthy, productive potato patch in late October, centre-stage in my little backyard, in the sunniest bed I have.

And here's the potato patch a few weeks later, in late November, doing what potato patches must do in order to produce spuds – ie, die back horribly. And that's a downright awful look for a small, pretty garden!

The harvest was both delicious and lovely to behold (these are King Edward potatoes, and a mighty fine-tasting home-grown potato they are too). But after that first go at growing spuds, I knew that I wasn't going to devote my central, bestest bed to that ugly show again!

And so here we are back at bagged Spudland, today. The first green shoots are up, and the spuds are underway. While I plan to do an update a bit later on, showing the progress and other steps, to finish things off I might as well go through what I intend to do next.

It's the same as in-ground spud growing really. Potato plants like lots of sunshine and a steady supply of water, so they'll get that, but no more feeding is needed. Pests weren't a problem here last year, but there is a caterpillar which can munch on them, so I might use a spray of an organic product (either Dipel or Success) to control these, if I notice any flitting about.

I'll just let the shoots grow on until they are about 20cm tall, then I'll add another 10cm layer of compost and straw to cover up the bottom half of the plants (and I'll unroll the sides of the bag at the same time, to hold in that new layer of compost and straw).

I'll repeat this process one or two more times (but I won't fanatically keep on hilling soil like I did last year. Once the hills are about 30-40cm tall that's more than enough, judging from what happened here last year). Hopefully by then the bags will be fully unfurled and the only job after that is watering.

Then I'll let the plants grow and flower on, which should happen some time in November, I suspect. A few weeks after flowering finishes the plants will start to die off, and the longer I leave the plants the better my harvest will be. Last year I harvested earlier than I should have, and still managed to get lots and lots of spuds. So the best idea is to just harvest a few at a time, taking just as many as you need each time, and let the other spuds keep on developing under the soil.