Well, it only took two months to get our latest frangipani planted. I thought it would take longer, being a pessimist about my workrate during summer, but the last two cooler mornings have seen the whole job done.
Regular readers might remember this blog posting from December, when Pammy came across this very nice little baby frangipani tree at a local ceramics gallery, where she conducts painting classes. Home it came to our place, I blogged about how wonderful it was, then followed the hottest, most humid and nasty summer for many years. In the last two days the weather looked a lot better, so I got to work.

(I like to do my summer gardening very early each day ...)


If you haven't planted out a baby tree from its pot, the basics are simple.
Water the pot first and let it soak for a while, to loosen the root ball, while you dig the hole. The hole itself should be no deeper than the pot itself, but twice as wide. Don't add any fertiliser to the hole.
Take the plant from its pot, very gently! Sit it in the hole and do a few checks.
Make sure it is facing the way you want it to face.
Next, make sure the soil surface of the pot's soil is at least level with the surrounding soil. (Lay down a straight stick/rod to check your levels are OK.) Lower than the surrounding soil is bad, slightly higher is OK, level is fine too. Then fill in around the hole with the surrounding soil. Lightly tamp it down, but don't pack it down. And never cover the pot's soil with garden soil.
Did I say don't add fertiliser? Well, don't. Then water it generously from a watering can, to which you have added some seaweed solution (here is Australia it'd most likely be either eco-seaweed, or Seasol). That's it.
Now, finally, a photo to finish of the dead grevillea, and its empire of Spanish moss, because we've come up with a wonderful idea for where to put the Spanish moss (if it works). AND, I've also started up a bonsai growing project that has been on the back burner for quite a while. So expect a few more February postings from this little amateur gardener.
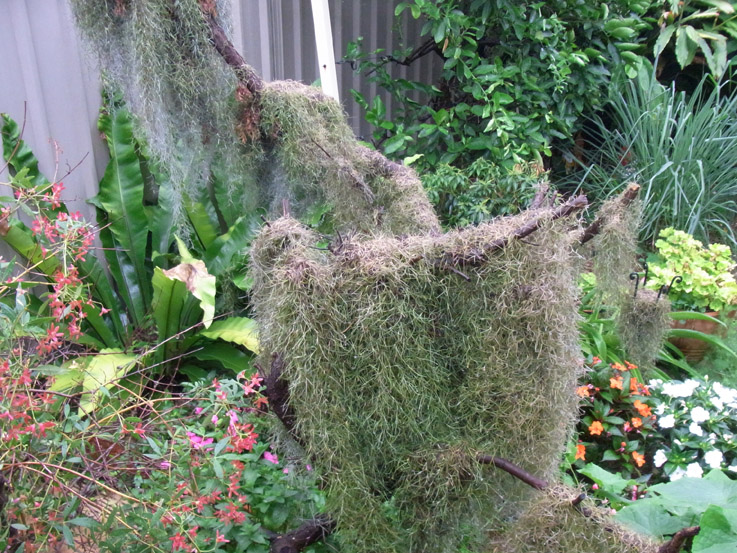
Farewell old Grevillea 'Peaches & Cream'. Sad ending, but you were a wonderful native garden shrub, stunningly colourful, a mecca for squabbling honeyeaters, and in your demise, a hauntingly memorable display stand for our beloved Spanish moss. You will be missed!


No comments:
Post a Comment