Showing posts with label Herbs. Show all posts

Friday, August 31, 2018

Doing our bit to help the bees


While pottering around our inner-city garden, there's always some kind of background noise, whether it's merely traffic, neighbours talking, or local birds calling to one another. But the sound I enjoy the most is the hum of bees. 


A native blue-banded bee closes in on an eggplant flower.
Not only is it a happy sound but it's also a vital signal that our backyard garden is a safe place for bees and other insects to go about their work, and make a living. Doing the right thing by bees isn't rocket science. There's just two steps.
1. Plant bee-friendly flowering plants (and there are lots of them)
2. Stop using harmful insect sprays that kill bees and other beneficial insects.
Bees go mad when our lemon tree flowers, which it will do soon.
As spring is upon us here in Australia, and gardeners everywhere are thinking "what can I plant now", it's the perfect time to put in a plug for becoming a bit more bee-friendly, whether you're a balcony gardener, own a rambling country estate or, like Pam and me, have an ordinary suburban backyard.


Our poppies are blooming now, and bees almost bathe in the plentiful pollen.
Now, I've done numerous postings about bees over the years, and this latest one has been prompted by an email I received from Taronga Zoo (for out-of-towners, Taronga Zoo is Sydney's largest and oldest zoo, situated on the edge of Sydney Harbour — visiting Taronga is a part of most Sydney childhoods. It was certainly part of mine, with countless visits there). 

It might come as a surprise to some to know this, but Taronga Zoo cares for its bees in the same way it does for all its other creatures — with loving devotion. This Sydney winter has been very dry indeed — there's a drought on — and so flowers are fewer and life is tougher for Taronga's bee population (and all other bees in Sydney). One simple reason for looking after bees is that Taronga has its own vegie patch, to provide food for its animals, and as every vegie gardener knows, bees play a vital role in pollinating all sorts of crops.


Taronga's beekeeper inspects one of their hives.
What Taronga would like everyone in Sydney to do is simple: make your garden friendlier for bees. So here's some very basic tips on how to get started, but before I do that, I have to include this next photo, just to show you how popular beekeeping has become in Sydney. 


About 200m from my house, the roof of this corner shop in Marrickville is
very probably what my busy backyard bees called "Headquarters". And so
in doing my bit in the inner-city, I'm helping gourmets to be happy. 
Apart from following guideline number 2: "don't use harmful sprays", following guideline number 1: "plant bee-friendly plants" is very easy to do, because there are so many great plants to choose from. The basic rule is this: if it produces a flower, the bees will find it.

Flowering shrubs: lavender probably tops the list, but all daisies are fabulous, too. Shrubs such as abelia and buddleia are famous bee-attractors, but on a small scale little alyssum (sweet Alice) and nasturtiums do a great job, and so do my poppies. But all annual flowers are great for bees, and probably the perfect choice for smaller gardens and balconies. 

Natives: all the flowering native shrubs are brilliant bee magnets, but top choices would include hardenbergia, grevilleas (which come in all shapes and sizes), bottlebrush, westringia (coast rosemary, a very good hedging plant), and native daisies (Brachyscome). 

Herbs: most people think "foliage/leaves" when you say "herbs", but all herbs flower well and bees love them. Basil is terrific (and now is the time to plant some), but oregano, marjoram, sage, rosemary, mint, coriander and lemon balm all do a great job attracting bees. Borage is probably the star of the bee-friendly herb garden, as bees adore its plentiful blue flowers.

Flowering vegetable crops also attract (and need!) bees, especially tomatoes, eggplants, potatoes, zucchini, cucumber, pumpkins, watermelons and squash. So my tip is to plant some low-growing flowers next to your vegie patch, such as alyssum, petunias, low-growing daisies, etc. It's what "potager" gardens are all about: mixing flowers, herbs and vegies together so they attract bees. And besides, potagers just look better.

My citrus trees (lemon, Tahitian lime, Thai lime) all attract stacks of bees, and spring is a great time to plant one, and it's also the perfect time to fertilise them. All other fruit trees are magnets for bees when they are in flower, so if your garden design needs a small tree, think about a fruit tree next time round.


While the name of this thing is a "birdbath" nobody told the bees they can't
visit, so I always make sure there is a gently sloping rock in my birdbath so
bees and other flying little guys can take a drink, especially on a hot day.
So there you go, head off to the garden centre on a "bee-friendly" mission, and help maintain your local honey supply. 

Finally, you can also test out my favourite bee theory: no matter where you put a flowering plant, bees will find it. Go on, plant something in an out-of-the-way spot and keep an eye on it. Once it starts flowering, our little busy, buzzing hard-workers will soon be all over it. That's what I love about bees ... they are so good at their jobs!


Sunday, June 17, 2018

The 10-Year Rewind – Part 16 – Chermoula


Every day this month I am looking back on the 10 years since I started this blog in June, 2008. Part 16 is this one — Chermoula — from May 2010. Over the years I've done occasional cookery postings, and this is one dish I still love to make from scratch, starting the time-honoured way with a mortar and pestle.


With more than a week of relentlessly wet weather drenching the garden and ruining that kind of fun, there is but one thing for this boy to do – cook! But something new, something different. For our 20th wedding anniversary last year, Pammy bought me a lovely Scanpan Tagine plus a big, beautiful Moroccan cookbook, and that's where I went to for inspiration. Hmmm, "chermoula" – a classic North African spice/herb blend – that sounds nice. I have most of the ingredients either in the pantry or growing in the garden. Let's go.

I'll give the recipe at the end, but here it is in its prettiest stage, just after I added ground cumin, paprika and cayenne pepper to the garlic. But I am already getting ahead of myself.

Here's the makings of my chermoula. Coriander, parsley and lemon (all home-grown), garlic, paprika, cumin, cayenne pepper, olive oil, and mortar and pestle.

Oops, forgot to mention the salt. In fact the salt is a magic ingredient, as it helps to turn garlic to soft mush with just a few thumps of the pestle. It's just like a little chemistry lesson on its own, the way salt disintegrates garlic.

Then you add the three spices mentioned earlier.

Then add chopped parsley and chopped coriander, plus some lemon juice, then at the end, some olive oil.

Traaa daaaa! Chermoula. It wasn't that hard to do, but the trick is to not add all the bulky parsley and coriander in one go. I added it in small batches and it quickly pounded down. Total time taken to pound it all down to a paste was about 5 minutes. Good village-style peasant work, and good rainy-day work, too. I suppose you could do it all in a blender, but it wouldn't come out like this, with the little chunky bits here and there.

The next step is to coat the "meat" with some of the chermoula. This in fact is a beautiful fish called Bass Grouper (it's similar to blue-eye cod). It comes as big, thick steaks from which I remove the bones, then cut it into chunks. It holds together beautifully in cooking and remains moist, never seems to go dry. However, this recipe would work equally well with other meats, such as chunks of chicken or pork, for example.

Next, the vegies. Here, I cut up slices of potato, red and yellow capsicum, zucchini, and tipped in a can of diced tomatoes, then stirred in the remainder of the chermoula and a few leftover scraps of parsley and coriander.

Big spoon to toss all the vegies together, plus a grind each of salt and pepper, and a drizzle of olive oil.

Any casserole dish will do, of course, but I do think my tagine looks snazzy.

Into the tagine I scooped in half the vegies to layer the bottom, then covered these with all the fish (which had been marinating in the chermoula for the half-hour it took to prepare all the vegies), then I covered the fish with the rest of the vegies. Lid on. Bake one hour at 180°C (350°F) and it's ready. Serve with couscous on the side.

Halfway through eating it, I said to Pam: "Oh oh, I forgot to take a photo of the finished dish". So you'll just have to imagine the results. It tasted yummy, though. Anyway, here's the amounts for the chermoula. As for the vegies, I just made all that bit up as I went along.

Chermoula
2 garlic cloves, roughly chopped
1/2 teaspoon salt
3 tablespoons chopped flat-leaf parsley
3 tablespoons chopped coriander (cilantro)
2 teaspoons paprika
2 teaspoons ground cumin
1/2 teaspoon cayenne pepper
1 tablespoon lemon juice
2 tablespoons olive oil

Method: pound the garlic with the salt until mushy, then add the paprika, cumin, cayenne pepper and lemon juice to make a paste. Then add the parsley and coriander in batches, and pound until reduced in bulk. Finally, work the olive oil into the mixture in stages, until blended nicely.

(For Aussie readers, this recipe is from the excellent book, "The Food of Morocco" by Tess Malloss, published by Murdoch Books, ISBN 9781741960341).


Saturday, August 19, 2017

Parsley and me


Are there plants in your garden which you have an uneasy relationship with? For me, parsley is one such plant. My experience with parsley over the years has been generally a good one: I've grown countless healthy crops of parsley, chopped up oodles of the stuff and tossed handfuls into soups, casseroles, salads and sauces ... but ... growing it has always been full of false starts and generally fussing over the things until they're totally happy. 

I find parsley can be a hard herb to get growing, and yet I know of gardeners who complain that their parsley is a weed at their place, it self-seeds like crazy, they never have to plant any, it just pops up ... and what's my problem?


Maybe it's because my garden is overcrowded and small and turnover of plants is high, but I've rarely had self-seeding parsley cropping up of its own volition. I've tried letting plants fully go to seed, but it's never produced much in the way of results. 

Instead, it's a regular ritual to replace and replant my parsley crops. Pictured above is what I planted last weekend — some small seedlings of parsley. The former parsley plants in the same spot suddenly went to seed, so I pulled them up and filled the gap with seedlings this time round.

This is not the ideal way to grow parsley, as parsley grows best from seed, but it can be grown from seedlings, if you are very very good about keeping the seedlings well watered and happy. 


By contrast, and nearby to my bought seedlings, these two happy parsley plants (one flat-leaf and the other curly-leaf) have grown from seed sown a few months ago in late autumn. They barely needed any care at all and are powering along now.


The problem with parsley seed, pictured above, is that when you sow it, it can take three to four weeks just to sprout. It is super-slow to get going.


How's this for backyard science? I once put some parsley seed under my school kids' microscope (an inspired gift from Pammy) and this photo shows what a tough, ridged thing a parsley seed is. You can help to speed up germination of seed by soaking it in water overnight, but it doesn't speed things up all that much. It still takes three weeks.


Half the trick with parsley seed is distinguishing them from weed seeds. You need to wait till the second pairs of leaves appear, and they have the distinctly parsley shape. The first baby pairs of leaves look nothing like parsley. 

And the other trick with parsley seed is to simply sow lots of it. Don't worry about neatly planting one here, another there. Just scatter them in small batches, and water well, so the seed slips into cracks in the soil. Keep the area lightly moist for the next month (!) and eventually a goodly number of seeds will come up, and the baby plants that manage to grow on will usually be tough, robust and healthy.


A few years ago I sowed a whole packet of curly parsley seeds to form a border around a potager vegie bed. It took months to get the whole thing going, and it was the typical mad labour of love that I like to do sometimes. But it did look nice and every plant was wonderfully healthy and quite gorgeous.


That said, growing parsley from seed takes time and patience, so it's much easier to buy either a punnet of established seedlings, or a large pot of parsley and divide it up into several clumps. Here's a few tips that might make the process work.

1. Don't over-handle the seedlings. I like to buy a pot or two of parsley seedlings, which might, if you counted them, contain 30 fairly tiny, delicate seedings. What I do is divide that into 3 clumps of 10 seedlings each, then plant each clump. Parsley is notorious for going into "transplant shock" (it's a problem it shares with some other members of the same Apiacaea family, such as parsnips, carrots, chervil and dill).

2. Water the seedlings well. Of course, water well at planting, but never let seedlings feel stressed by a lack of water. Depending on the weather (such as a series of several warm spring days) that might mean daily watering with a light spray.

3. Mollycoddle them with seaweed solution. Here in Australia the leading brands are Seasol and Eco-Seaweed, but whatever you use, apply some liquid seaweed solution at planting time, and probably once a week for the first month of growth. This stuff isn't a plant fertiliser, but it is a "root-growth promoter" and also a plant-stress reducer, so it is very useful in keeping wobbly parsley babies on the right track.

After about a month in the ground, if your parsley babies are getting bigger and look like they're happy, they should turn into normal, healthy parsley plants. It's just that first month after planting seedlings which is tricky, where seedlings need extra care.

4. Take out insurance and scatter some seed. It might seem like overkill, but after planting parsley seedlings I also scatter a few seed in the same spot for luck. They'll take four weeks to sprout, and if all goes well with your seedlings, you'll never know what happened to those seeds. But if the transplanted seedlings don't make it, it's almost certain that the seed-raised plants will.

I think that's enough on parley for now ... may your crops thrive.


Friday, July 7, 2017

Thyme management


Wandering into the kitchen yesterday afternoon, I was greeted by the very pleasant sight and smell of a lot of thyme drying on some paper towels. What was Pam cooking? I wasn't sure, but at least I knew it was going to have lots of thyme in it.


Even if Pammy didn't use all this thyme, I was still pleased to see how much she harvested, because that's what I like to do — harvest a lot more thyme than I need each time I plan to cook with thyme. We have no shortage of thyme growing here, as you can see below, and a key trick to keeping it so lush and bushy is that we cut it back all the time, and never worry about cutting off too much each time we get some for the kitchen.


This is just one pot of thyme, sitting on the path under the clothesline, in the sunniest part of the garden. It's spilling over the edges of the pot and trying to send roots down in the nearby garden beds and even into cracks in the paving. It's a weed at heart. 


Like our thyme, the rosemary and sage are also doing well here, and part of the trick of keeping them growing abundantly is to harvest often, or cut them back often even if you don't need that much in the kitchen. I feed these potted plants just once a year, but I do water them often and cut them back often as well.

I have a particular affection for thyme, it's the herb I use most often (along with parsley). It smells so nice as you wash and prepare it, and it's such a versatile flavour, too.

Well, what did Pammy do with her many branches of thyme? She dropped them into a baking dish with an inch-deep puddle of olive oil in the bottom, then added lots of cherry tomatoes, and baked them in a preheated 180°C oven for about half an hour. Then she boiled some farfalle (bow-tie) pasta, drained the tomatoes of their olive-oily, herby bath, then tossed the cooked cherry tomatoes through the pasta. It was a side dish, but at the same time the star of last night's meal. Thankyou Pammy, thankyou thyme.


Sunday, January 15, 2017

Summer panoramas


Lots of Sydney gardeners will tell you that we don't really have four distinct seasons here. We kind of spend most of the year in a lovely, mild warm season, then it gets cold for half a dozen weeks in the middle of the year, and horribly hot and humid for another half-dozen weeks around this New Year time of year. 

In the same sense, we also don't really have one particular "peak" season, as cool climate gardeners tend to enjoy each spring. We enjoy several little peaks every year, and right now, in the middle of the horribly humid and hot time, when we're almost tropical in every way, well-watered Sydney gardens go berserk. Which is what our garden is doing now. 

So here's three "panorama" style wider-angled photos of midsummer madness in Sydney. Hopefully if you click on each photo, it will come up a lot lot bigger.  


Using my iPhone's nifty "Panorama" function, this photo starts on the left with the rather ghostly looking sight of Spanish moss covering the bare branches of our recently carked-it ex-grevillea. On the left is a patch of cucumbers, chillies and assorted flowers. Big frangipani rear left, and on the right is a lemon tree, succulent patch, basil, Thai chilli, lots of geraniums and assorted others.


Taken from the other end of the path, this is the succulent patch, and beyond that are basil, shallots, geraniums behind, and mint bushes behind the geraniums. 


The dominating, broad-leafed thing in the left foreground is the "Cute Cucumber" which has spread far and wide, and produces about four or five new cucumbers to harvest every day. The yellow flowers are hardy marigolds, the white and reds and New Guinea impatiens, and the blue is salvia. Herbs include chives, garlic chives, thyme and the lovely big lemon grass in the background.

And so there you have it. A well-watered Sydney garden loving the heat. 

One handy tip right now for Aussie gardeners is to keep on watering pots well, especially on days when "a few showers" are forecast. Usually the showers do manage water the soil a bit, so you might not have to use the hose, but these light showers hardly do anything for potted plants, which can dry out amazingly fast in the summer heat. So I water my pots every day, unless it is truly pouring rain.


Sunday, October 9, 2016

October surprises


Some mornings, I know exactly how daisies feel. It's not enough for the sun's early appearance to turn night into day. What daisies need is to feel the sun's warm, direct rays beating down on their flowers, and then (and only then) will they open up and do their thing. 


Looking like a cluster of mini suns, the "surprise" part of this purple-leafed, yellow-flowered daisy bush is that it's a lettuce plant enjoying its floral fling before signing off on a life well lived, however briefly.


This handsome purple tower was once a low-growing, purple patch of "pick-and-come-again" loose-leaf lettuce, looking much like its green lettuce siblings growing at its feet. Then, two weeks ago, it made its break for adulthood and rose daily, inches at a time. I watered it and gave it a feed to encourage it, and in the last few days it has repaid the favour with its own flower show. Bravo!


In a recent posting on bees I showed you a photo of this shallot flower, but it's so delightful I want to show it again. And it's not alone in this world, either. While I have another mini patch of shallots growing well in another bed, I've very happily watched these shallots doing their flowery thing for the last few weeks. There used to be more of them in fact, but in the last few days both Pammy and I have harvested some from this patch for dinner, and they're still perfectly fine to cook with, but probably getting a bit too strong-flavoured for salads anymore. 


My final little October surprise is this perfectly predictable scene of our common sage bush in bloom. The "surprise" factor is simply that it is flowering so well this year. It was looking utterly rough, scrawny and bedraggled in the middle of winter, so I adopted the simple policy of "cut off all the ugly bits" (and there were a lot of them, too). It seems to have worked. All the healthy wood that was left has burst out in new growth and, in the last few days, created this explosion of mauve good health.


Sage has wonderfully complex flowers, too. With their mouths agape as if singing a long, high note to finish a song, sage flowers remind me of some orchids. 

I have no problems imagining that on other planets, alien life could easily be comprised of flowering plants that talk.


Monday, May 30, 2016

Loving it here


Do you have a plant in your garden which just thrives and does well, no matter how little you care for it? (And that's not counting weeds, of course!).

Here in Garden Amateurland our happiest little person is that humble herb, thyme. Several years ago, it was almost taking over the joint, spreading across the pathway and loving life in a most fragrant and deliciously useful way.


This photo was taken back in 2010, and at least two-thirds of the plant is actually sitting on our pavers. Just the small portion on the far left had roots in soil. It's a good example of how in the wild thyme spreads itself over rocks on sunny hillsides. It's a sunbather of a plant.

Well, in 2012 we dug this herby marvel up and planted one remnant in a pot. It had to go as this is where our succulent patch is now located, and that big bush really was enough thyme for a thousand families, and there's just Pammy and me here doing the cooking and eating.


The wide, shallow pot of thyme still loves life here just as much as when it was in the ground, and it has spilled over the side of the pot and its roots have managed to find some soil in the gap around the base of our clothesline (that green thing poking up on the left side of the photo). 


It might just be my imagination but I think the thyme growing in the ground, around the clothesline, is a bit more fragrant than the pot-grown herb.


The pot-grown thyme is a bit more lush and green than the in-ground stuff, and that's because I do water the pot regularly. I guess the thyme in the ground must get some extra water from splashes and the moisture leaking through the drain holes in the pot, but it's just a tough plant that is doing great with hardly any help or encouragement from me.

I probably use thyme in the kitchen as often as I use parsley or basil, which is a lot. So all my regular harvesting of leaves does constitute pruning, and it certainly does make the plant bushier. Every now and then, if I haven't been cooking a lot lately, I do give the plants a very quick and crude haircut, grabbing handfuls and shearing them off with the secateurs. Into the compost it goes, and the aroma of the whole exercise is sensational.

I wish I could tell you the secret of keeping thyme thriving and lush, but I think that would mean that somehow I can take some of the credit for the fact that this little herb just loves almost everything about this backyard, but I suspect that least of all, it's me.


Wednesday, May 18, 2016

Sweet shade


Success has its rewards, but like most drugs it also has its undesirable side-effects. Here in sunny Garden Amateurland, our modest success in growing things in all our lovely Australian sunshine is, ironically enough, lots more shade, and less sunshine.


Avert your eyes from our captivating tresses of Spanish moss for a moment if you can, because in the background you can see our two major shade-makers. In the centre is a lemongrass patch that has grown that big in one season, and on the right is our beautiful frangipani tree, which once was a cutting but is now approaching youthful adulthood. The little patch of straw mulch in front of both was once our garden's sunniest spot, a thriving little vegie patch, but right now it barely gets an hour of direct sunshine each day. It's overshadowed by success and I'm not sure what to grow there.


What to do with the lemongrass is a simple matter of cutting it back a month or two from now, in what was once known as "midwinter". I suspect we won't get much of a winter this year, if our warmest-ever autumn is any guide. However, the lemongrass will benefit from a very savage cutback, but will be this size again, same time next year. It's one of my favourite plants in the garden. It's very pleasantly lemony-scented to be near while I'm weeding, and its many graceful arches look like a green fireworks explosion frozen in time.


As a result of all this shade, I have swapped around the roles of a few garden beds. This is eastern side of the garden, now our sunniest spot.


One little bed is now our salad patch. In the foreground, another row of radish seeds have just sprouted this morning (hello!), next to them some lettuce seedlings are doing their thing, and barely visible, slender baby shallots/scallions are making their usual hesitant start.


Next door to salad-land, in our other sunny spot, that's parsley in the foreground, grown from supermarket salad parsley 'micro-sprouts' (see this older post for more on that), and behind the parsley is Pammy's 2016 crop of Iceland poppies, something I grow for her every year.


As for what to grow in the shadier spots, several different herbs do remarkably well in less than full sunshine. Here's some chervil supermarket mico-sprouts planted just yesterday. Chervil is a herb more people should grow and use in both cooking and salads, and it has the bonus that it is not only good in semi-shade (or semi-sunshine if you like), it actually seems to prefer the gloom. Parsley also copes fairly well with semi-shade, and as I've also planted a whole punnet of coriander micro-sprouts from the supermarket into the semi-shaded spot overshadowed by the lemongrass, I'll soon find out how it goes there. 


As for what to do about our garden's major shade-maker, the frangipani tree, it's a conundrum. It's beautiful, and as you can see here it's not just beautiful on the outside, with its fragrant yellow-centred white blooms. Even on the "inside", the space under the frangipani is a deep-shade mini forest that has a touch of the fairytales about it. It does need to be trimmed a bit, but not too much.

In years gone by the deciduous frangipani would drop all its leaves in June and would only fire up again in greenery in late August. In our ever-warming climate I suspect it will be leafless for just a few weeks every year.

The frangipani is also spreading so wide it's actually growing over the path leading out to Pammy's art studio at the bottom of the garden, so a few branches will be removed in winter so she can get out there without being fragrantly whacked in the face next summer. 

We haven't really made up our mind what to do about the frangipani. In the long run it will grow bigger and it will change how our garden grows. My instinct is to go with the flow and not to be too much "in charge" of everything that happens here. I'm just the gardener. While the odd bit of wayward frangipani might be lopped off, I suspect gardening here over coming years will take its own sweet-scented course.


Saturday, November 8, 2014

Splashing out on herbs


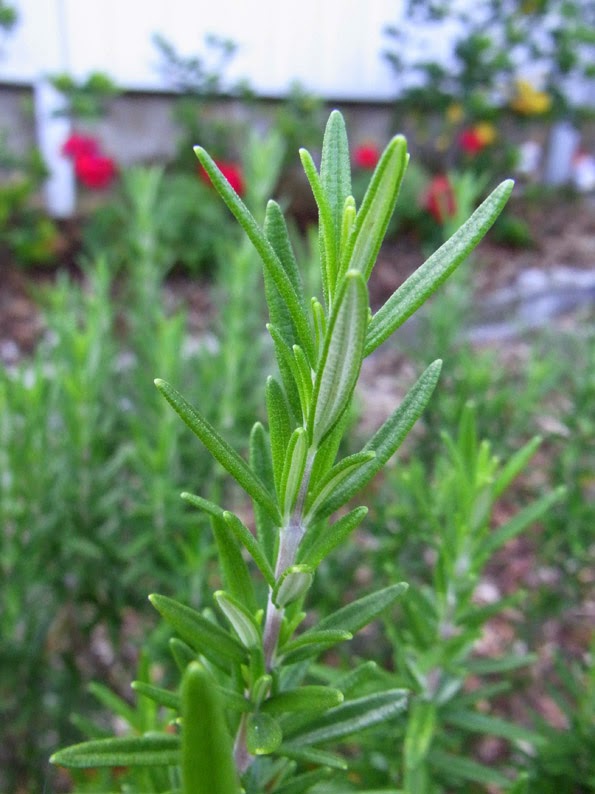
It's amazing what a difference a pot can make to a plant's personality. In the case of my traditional 'Mediterranean' herbs such as rosemary, thyme, oregano and bay leaf, they have turned out to be very different plants to care for, compared to how they grow in ordinary garden soil. Yes, of course they need more maintenance in a pot, but I am surprised how thirsty they are. They all love a drink (well, at least in springtime they do).

Let's put this discovery another way. Since I have started watering these potted herbs a lot more often than I ever did in previous years, they are much happier. And yes, I am slow on the uptake sometimes. (Just ask Pam!) 


Much happier now that it is being watered
every morning, the rosemary is lush, deep
green and very fragrant to be around.
As I water the rosemary now, I can smell its 
sharp scent wafting around in the air.

Same goes for my potted bay tree. More water
this season has produced more growth, and
much nicer looking foliage. 
The thyme is flowering its head off at the moment. It needs the
most clipping to stay bushy, plus, you guessed it, water.
I've already done a blog posting recently on this potted oregano
patch, but it needs lots of watering as well.
Though hardly classic Mediterranean herbs,
the two pots of mint (common mint in the
foreground and basil mint behind) lap up the
water like a pair of thirsty hounds. 
When I grew rosemary, oregano and thyme in the ground I never watered them. Sydney's relatively abundant rainfall took care of all their needs for many years. And so I always thought of them as almost drought-proof and definitely not thirsty. I knew that transferring them to a pot would mean I'd have to water them more often, but I have, until now, underestimated how much water they need.

And so, Aussie gardeners, if your potted Mediterranean herbs aren't looking too terrific this spring, think about giving them more water more often. It might be what they desperately need. 

I'm not sure what they want once summer comes around, but my new hunch is that it will be more water than I gave them last summer...